Teaching with EduBeam
EduBeam started in a lecture hall, and that is still where it works best: a model on the projector that reacts the moment you change it, and the same model on every student's laptop through a link. This page collects what teachers use most.
In the lecture
- Make it readable from the back row. In Settings → Viewer settings, raise the Font size to 18–20 px and the Support size to 130–150 %. Raise the Results scale if the diagrams look timid on a large screen.
- Show one thing at a time. Untick everything in the display options except the quantity you are talking about, then add the others one by one.
- Change the model live. Drag a support, tick
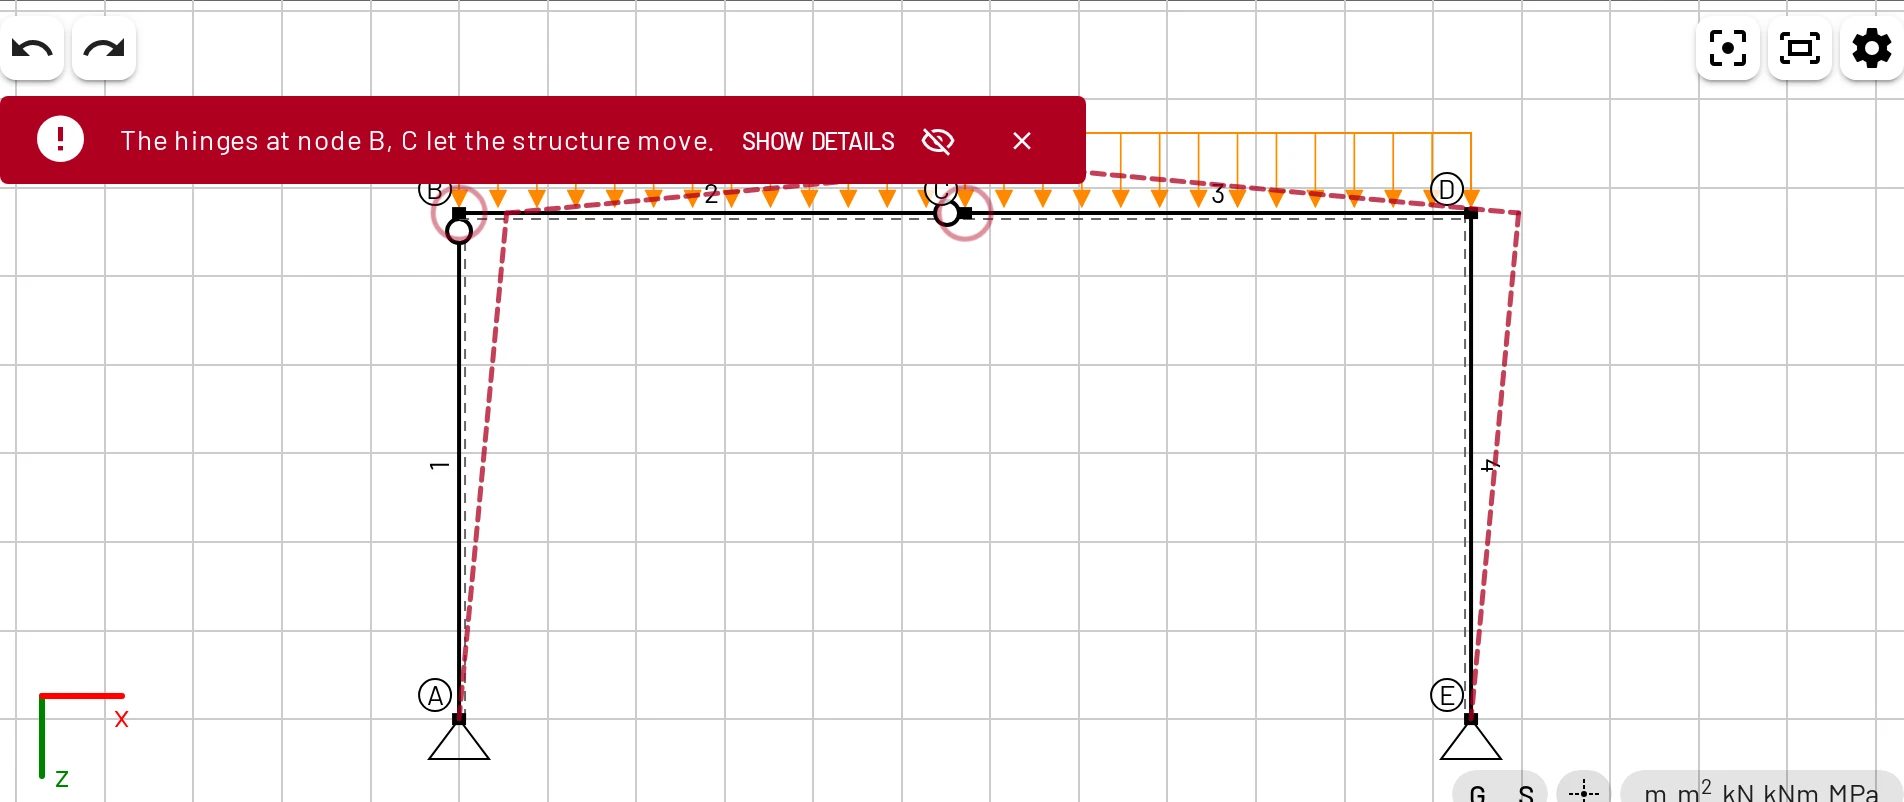
Ry, add a hinge. Students see cause and effect at once, and Ctrl+Z takes you back. - Let the solver explain mechanisms. Release one hinge too many and EduBeam swings the dashed outline of the mechanism and circles the hinges at fault. It is a good moment to discuss stability.
- Use the students' language and axes. Pick the interface language, SI or US units, and z-down or y-up axes to match your course notes.
In lecture notes and assignments
A share link contains the whole model, so it works anywhere a link does: a PDF, a slide, an LMS page, an e-mail.
- Build the model and press Share model → Copy.
- Paste the link into your notes. Links from older EduBeam versions keep working, so notes stay valid year after year.
- Students who open it get their own copy to experiment with. Nothing they change reaches you or other students.
Useful link variants:
| Link | Opens |
|---|---|
https://run.edubeam.app/?model=… | The model, ready to edit |
https://run.edubeam.app/?viewer=1&model=… | The model in viewer mode, for embedding in an <iframe> |
https://run.edubeam.app/?panel=examples | The examples gallery |
https://run.edubeam.app/?lang=cs | The app in Czech (or any other language code) |
Opening a link replaces the student's own model
The model they had goes to ☰ → Recent structures and can be restored, and a message says so. Still, tell students to save work they care about with Save project before opening links from class.
Assignments students can check themselves
EduBeam gives students immediate feedback on their hand calculations without giving away the method:
- Ask for reactions, internal forces and one displacement by hand, then have students build the model and compare. Checking results by hand has ready-made formulas.
- Ask why a result differs: shear deformation, a missing hinge, a load in local instead of global axes.
- Ask students to hand in a share link or a
project.jsonalong with their calculation. You can open it and see exactly what they modelled. - For reports, students can export the drawing as SVG (sharp in Word and LaTeX) and the results as CSV.
Ready-made exercises
- The Examples page has six models, each with suggested exercises.
- The three-hinged frame and plane truss tutorials are complete worked examples with hand checks.
- The Quick start works as a first-lab handout: it takes about ten minutes.
Getting students started
New users see a welcome dialog with two guided options: Show me around (a tour of the interface) and Draw your first beam (a seven-step task with the mouse). Both are also in the ☰ menu. Many teachers simply say "open run.edubeam.app and choose Draw your first beam" at the start of the first lab.
Offline and lab computers
EduBeam is a progressive web app. Once a computer has loaded it, it keeps working without a connection, and the browser may offer to install it. Models and settings are stored per browser profile, so on shared lab computers students should save their work as files or links.